Installing a Vineyard: Line Post Decisions
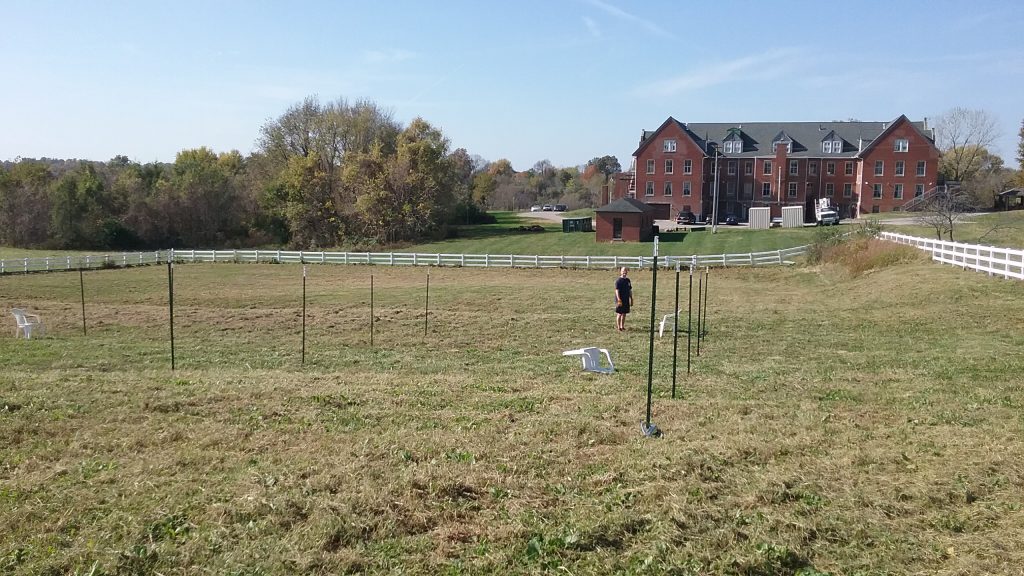
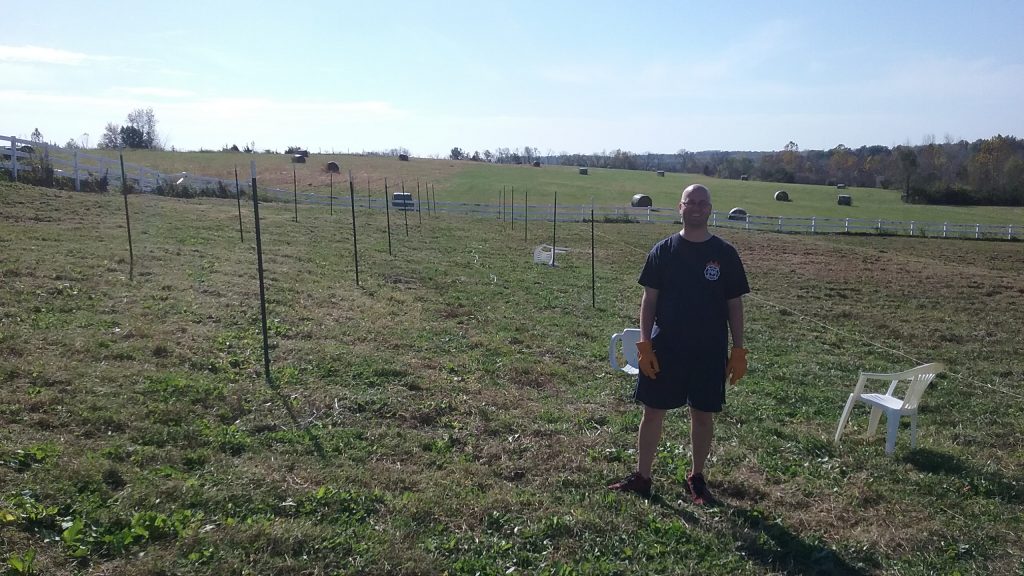
Today we started putting in a trellis for our new vineyard at Belvoir Winery in Liberty, Missouri. There was something very satisfying about punching in those T-Posts, seeing that they didn’t fall over and admiring how we managed to keep them in straight rows.
At the beginning of today I wasn’t entirely confident it would turn out so well. As a complete novice when it comes to installing vineyard trellis systems (I can’t really count my backyard wire–free mini-vineyard of Norton vines can I?) I had no idea if what was in my head would actually transfer effectively to the paddock. I’d read quite a lot, talked to quite a few people and mapped out a basic plan on the computer, including calculating spaces between the line posts and rows. But that was only theory — what about the practice?
At this first stage of putting in the trellis (just line posts at this stage and we will add end-posts and wires after planting vines in April next year) the worries were numerous and included:
- Earth Issues: Maybe the ground is too soft for T-Posts and they will fall over as we punch them in with the post-puncher, even disappear completely into the ground?
- Straight Line Doubts: Is it really possible to ensure line posts are in a straight line by running a string from the first post to the end of the proposed row? That sounds too simple.
- Uneven Ground: Maybe the field where we are putting the vineyard is much more uneven and undulating that I remember it. So the trellis will look awful whatever we do?
- T-Post Uncertainties: Was it really a good idea to choose T-Posts at all? Maybe they will look really ugly and be impossible to line up properly for some unknown reason?
- Midlife Crisis: Maybe I should stick to looking after our kids and part-time writing. Who are you kidding about this vineyard stuff?
After a three-hour session this morning, punching in the first six rows of line posts with Belvoir boss Jesse Leimkuehler, the skies have lifted and issues 1 to 4 have been answered very positively. It’s fair to say number 5 is still a lingering doubt but I’ve suppressed it with today’s good news.
- Earth Issues Answer: As we punched in the 8 foot T-Posts we found our clay dominated soils with varying amounts of pretty loose, organic topsoil (the paddock had two horses in it until recently) were very soft in some spots and almost rock hard in others. It didn’t seem to matter, the posts went in with varying degrees of grunting but always ended up sufficiently straight and solid.
- Straight Line Answers: There are various ways to make sure your vineyard rows are straight and all of them had me running scared. I’d read about high-tech vineyards using GPS positioning on a laptop to ensure their vineyard rows were straight (I only got a smartphone a few months ago so no thanks). There’s also the method where you get in your tractor and trust it to drive in a straight line and just plonk in the posts as you go (I’m too effete to drive a tractor with any skill). I’d also read you could use a rope or string and just attach it to a line post or some other anchor where you want your row to start and run it all the way to the end of the row. This method sounded pleasingly old school and straightforward — but do they make balls of string that long? I checked the label on the brown ball of garden twine I’d purchased a couple of years back and saw that it claimed to contain 208 feet of twine. Our rows are about 225 feet long and luckily during a senior moment I’d bought another ball of the same brown twine so we had plenty of string. The paddock where we are putting the vineyard is fenced so it was easy to tie the string to the lowest plank on the fence and attach it on the same lowest level plank at the opposite side of the field. Despite being thin, brown garden twine the string was strong enough to do this without breaking and we got nice straight rows as a result. Before banging in a T-Post we’d have our string as one alignment guide, then we’d use a yardstick to recheck that our row width was still 12 feet and our eyeballs to line up the post with preceding posts – then bang it in!
- Uneven Ground Answers: Despite memories of seeing the field being ploughed earlier in the year and looking very uneven, six months of mowing the rye grass cover crop we planted in April have served us well. The field is not a bowling green but it’s relatively flat and even. At places where the ground dips a bit we’d leave the T-posts a few inches higher to compensate a little.
- T-Post Uncertainties Answered: Wood might look prettier, but standing 6 feet high, slim and elegant in their green paint with white tips, the T-Posts looked pretty good. Galen Haddock, owner and winemaker at Ladoga Ridge Winery in Smithville, Missouri, also wisely reminded us that you only really see the nice wooden line posts in winter when there are no leaves on the vines.
Other Line Post Considerations:
Why We Chose T-Posts For Line Posts and Not Wood or Steel Posts? At the last-minute we switched from wood to steel T-Posts thanks to advice from Galen from Ladoga Ridge. He made it clear that we were taking on a lot of work putting in wooden posts — auguring individual holes for 90 line posts and then back-filling them was going to take a long time. With T-Posts you just bang them in with a hefty hand-held punching device. He was right, we didn’t have the time to install wooden line posts. There’s also the added benefit that rust protected steel T-Posts are going to last longer than treated wood. We have straight steel posts in an old vineyard on the property and while they are cheaper than T-Posts, they clearly aren’t as good at staying straight and strong.
How Much Space Between Vines, Line Posts and the Rows? I’ve read in a few places that 24 feet is regarded
as the maximum space you can have between line posts so we opted for that. Our rows are quite short at about 160 feet so we wouldn’t be putting the sort of stress on the posts that longer rows would. However, I became worried that we would be opening ourselves to greater chances of the wind pushing over our trellis. A chat with Dean Volenberg, viticulture expert at the University of Missouri, Columbia allayed any fears. Dean made it clear that whatever the size of the gap between line posts you can never guarantee that the wind won’t blow over your trellis. He advised that a 24 feet gap should be fine but if we ended up having to put in more posts then we could still do that and with T-Posts it would be simple. So we stuck with a 24 foot spacing and we plan to plant Norton vines 8 feet apart (a standard width recommended by most experts for vigorous hybrid vines) and we’ve spaced the alley between the rows at 12 feet wide. A width between the rows of 10 feet seems to be more standard in the Midwest but we have plenty of space so we thought we might as well do 12 to give the vines more space and ventilation, possibly helping reduce disease (sure Danny).
Why not install enough T-Posts to have a vine growing at each one? This would entail having a T-Post every 8 feet. I’ve read that vineyards that use T-Posts often install enough to plant a vine at each one, essentially using them as line posts and vine stakes. For us, that would have entailed buying three times as many T-Posts which seemed quite expensive (we got our 8 foot T-Posts for $6 each at Tractor Supply Company). Even though you would save on having to buy bamboo stakes to support the growing vines, you would still spend more (bamboo stakes cost about $1 each). Another reason we didn’t go with this method is experience in our first vineyard where vines were planted at each metal line post. Now that some line posts need replacing, they are very difficult to extricate from the vines. I was also worried that planting the vines right next to the line posts would shade the baby vines. Additionally, aesthetically speaking, well-spaced T-Posts look quite nice but I didn’t think a forest of T-Posts would look as good.
So we’ve gone ahead with 8 foot T-Posts! We still have six rows of these things to put in. Hopefully our next line-post punching session will go as smoothly.
Postscript: We’ve just finished putting in the rest of the T-Posts. Many thanks to Bobby Higgins for doing most of the work. Thanks also to Jesse for suggesting I write this article (!) There are a couple of posts we will have to pull out and put back in because they are out of alignment, but the other 82 posts look good – so far!


How did you attach the wire to your T-post line posts? I see these things called T-post clips, but they just look like pieces of wire to me. It seems that, since T-posts don’t have any holes or hooks (just those knobs), that it would be difficult to ensure that the top wires don’t wiggle their way down past the knob?
Hi Brion,
Thanks for your question. To mark the one year anniversary of your question, here, finally is an answer to it (!)…you’ll find that those T-Post clips work well and don’t slip. The T-Posts I used did have hooks/nobs but the clips can be tightened very firmly and don’t actually need those hooks/nobs to stay up.